Understanding Furnace Gas Valve Repair: Why This Component Matters
Furnace gas valve repair is a critical—and potentially dangerous—heating system task. If your furnace won’t ignite or cycles erratically on a freezing Massachusetts night, the gas valve is a common culprit.
Quick Answer: Should You Repair Your Furnace Gas Valve Yourself?
- Safety Risk: Working with gas lines poses serious explosion and carbon monoxide hazards.
- Complexity: Requires specialized tools (multimeter, manometer) and technical knowledge.
- Cost: Professional replacement typically ranges from $300-$800.
- Recommendation: Most HVAC professionals advise against DIY gas valve work.
- When to DIY: Only basic diagnostics (like voltage testing) are reasonably safe for experienced homeowners.
- When to Call a Pro: For any actual repair, replacement, or if you smell gas.
The gas valve is the gatekeeper for your furnace’s fuel. It controls gas flow based on signals from the thermostat and control board, opening only when conditions are safe for ignition. A failed valve means no heat and potential safety hazards like gas leaks or inefficient combustion.
Understanding the furnace’s sequence of operations is key before attempting any repair. When the thermostat calls for heat, the control board starts the inducer motor, checks safety switches, and opens the gas valve once the ignitor is hot.
This guide covers diagnostics, when to DIY, and when to call a professional for your family’s safety.

Safety First: Critical Precautions Before You Begin
Safety is paramount when troubleshooting a furnace gas valve. Working with gas and electricity is inherently risky and can be life-threatening. Your utmost attention is required to avoid these primary dangers:
- Gas Leak Risk: Disturbing gas lines can cause leaks. Natural gas has a rotten-egg smell (mercaptan) to alert you, but even low concentrations can be dangerous. Propane is heavier than air and can pool in low areas.
- Explosion Hazard: Gas accumulation is highly explosive if ignited by a spark. Adhering to safety protocols is non-negotiable.
- Carbon Monoxide Exposure: A bad valve can cause incomplete combustion, producing deadly, odorless carbon monoxide (CO). A working furnace vents CO outside; any disruption is a safety risk.
- Electrical Shock: Furnaces use 120V and 24V circuits. Contact with live wires can cause severe shock or death.
To mitigate these risks, always follow these critical precautions:
- Turn Off All Power: Turn off the furnace circuit breaker to prevent shock and accidental ignition.
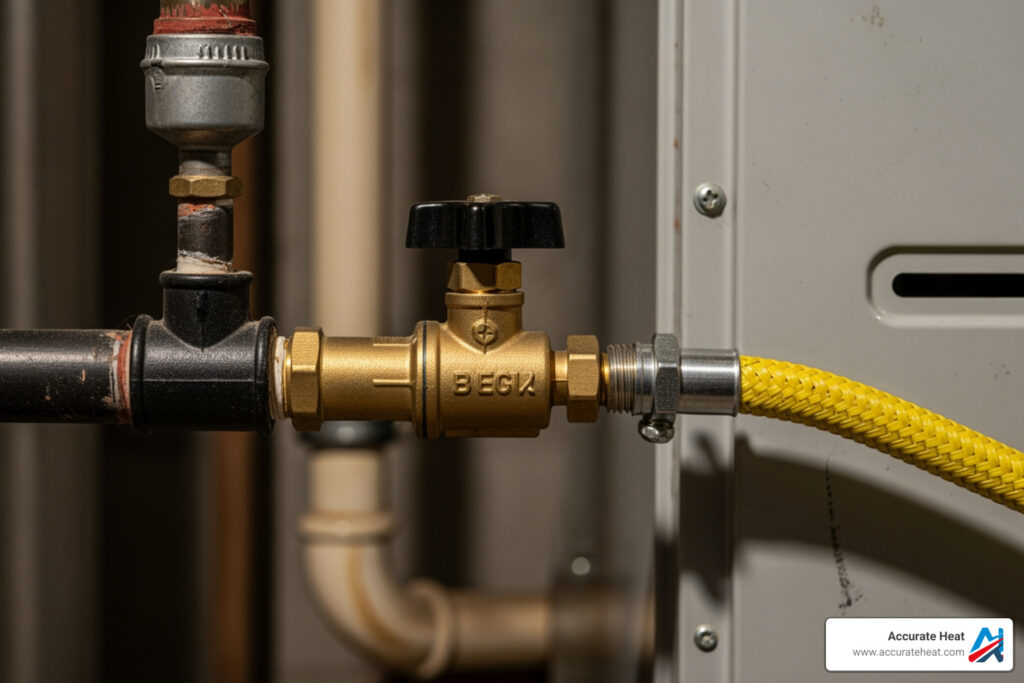
- Shut Off the Gas Supply: Shut off the gas supply at the valve on the pipe leading to the furnace (handle perpendicular to the pipe). You may need to shut it off at the meter for main line work.
- Ensure Proper Ventilation: Work in a well-ventilated area to disperse any residual gas.
- Have a Carbon Monoxide Detector: Have a working CO detector near the furnace and test it regularly.
- Use a Soapy Water Solution for Leak Detection: Always test for leaks with a soapy water solution after working on gas lines.
If you smell gas or feel unsafe, stop immediately. Turn off the gas and power, evacuate, and call your local gas company and a professional HVAC technician. Don’t risk your family’s safety for a DIY fix. For a deeper dive into furnace issues, check out our guide on Signs Your Furnace Needs Repair: Troubleshooting Guide.
Diagnosing a Faulty Gas Valve: Troubleshooting Steps
If your furnace isn’t heating properly, a faulty gas valve could be the issue. Recognizing the symptoms is the first step.
Common signs of a faulty gas valve include:
- No Heat or Very Little Heat: The furnace runs, but the air is cold or lukewarm.
- Furnace Won’t Ignite: The ignitor glows, but the burners don’t light, indicating the gas valve isn’t opening.
- Clicking Noises (No Ignition): A clicking sound without ignition suggests the valve is getting a signal but isn’t opening.
- Gas Odor: A rotten-egg smell indicates a gas leak and requires immediate professional help.
- Intermittent Cycling or Short-Cycling: The furnace short-cycles or struggles to maintain temperature, which could mean the valve is sticking.
- Soot or Visible Carbon Residue: Soot around burners indicates incomplete combustion, a possible valve issue, and a CO risk.
- Furnace Locks Out or Shows Error Codes: Frequent lockouts or error codes related to gas supply point to the gas valve.
Before complex diagnostics, perform these basic checks:
- Check Your Thermostat: Set it to “HEAT” and ensure the temperature is set correctly. Check batteries.
- Verify Gas Supply: Verify all gas valves to the furnace are open (handle parallel to the pipe).
- Check Other Gas Appliances: If other gas appliances don’t work, the problem is likely with the main gas supply.
- Observe Ignitor Function: If the ignitor glows but burners don’t light, suspect the gas valve or control board. If it doesn’t glow, the problem is elsewhere.
For more general tips, see our Furnace Repair 101: Troubleshooting Common Problems guide.
Testing with a Multimeter
If basic checks fail and the ignitor works, use a multimeter to test if the gas valve is receiving the correct voltage from the control board.

Here’s how to test for voltage:
- Safety First: Turn off power and gas.
- Access the Gas Valve: Remove the furnace panel to access the valve.
- Locate Electrical Connections: Find the 24V AC wires on the valve.
- Prepare Multimeter: Set your multimeter to AC voltage (VAC).
- Test Voltage: Place multimeter probes on the valve’s electrical terminals.
- Restore Power: Carefully restore power and stand clear.
- Call for Heat: Set your thermostat to call for heat.
- Observe and Read: As the ignitor glows, the control board should send 24-30 volts to the valve.
- Faulty Gas Valve: If you read 24-30V but no gas flows, the valve is likely faulty.
- Faulty Control Board: If the voltage is less than 15V when it should be 24-30V, the control board is likely the problem.
- Turn Off Power: Turn off power at the breaker after your reading.
Resistance Test (Advanced):
With power off and wires disconnected, set your multimeter to OHMS (Ω) and test the valve’s 24V terminals. A reading of “OL” (Open Line) instead of the specified ohms (e.g., 24-120 Ω) indicates a bad solenoid coil and a faulty valve.
Checking Gas Pressure
Correct gas pressure, measured in Water Column (WC), is crucial. Checking it requires a manometer and is a job for a professional.
- Inlet Pressure: Should be 7″-11″ WC from the utility.
- Outlet Pressure: The valve regulates this to about 3.5″ WC for the burners.
A technician will connect a manometer to the valve’s test ports. Low inlet pressure suggests a supply issue. Correct inlet but wrong outlet pressure (not 3.5″ WC) points to a faulty or improperly adjusted valve. For more technical insights, you might find this research on Furnace System Improvements helpful.
The Step-by-Step Process for Furnace Gas Valve Repair
To be clear, this guide covers replacing a faulty gas valve, not repairing it internally. This is a high-risk task that we strongly advise leaving to licensed HVAC professionals. At Accurate Heat, we prioritize safety. As our guide on hiring a professional explains, if you have any doubts about working with gas, please call a pro.
Essential Tools for Furnace Gas Valve Repair
The following tools are essential for this task:
- Multimeter: For electrical diagnostics.
- Manometer: For measuring gas pressure.
- Pipe Wrenches (two): For gas line fittings.
- Screwdriver Set and Allen Keys.
- Pipe Thread Sealant (pipe dope) or Gas-Rated Teflon Tape: For creating leak-proof seals.
- Soapy Water in a Spray Bottle: For leak detection.
- Adjustable Wrench, Rags, and a Bucket.
Safely Removing the Old Gas Valve
The general process for removing the old valve is as follows (ideally performed by a professional):
- Prioritize Safety: Turn off power and gas. Ensure good ventilation.
- Photograph Wiring: Photograph and label all wiring before disconnecting for easier reassembly.
- Disconnect Electrical Connectors: Detach the 24V electrical wires from the valve.
- Loosen Gas Line Fittings: Use two pipe wrenches to loosen the gas line fittings on the inlet and outlet sides. One wrench holds the pipe steady while the other turns the fitting.

- Unthread Valve: Remove mounting screws and unthread the old valve from the burner manifold.
- Inspect and Clean: Inspect for and clean any debris from the gas lines, manifold, and pipe threads.
Installing the New Gas Valve
Precision is critical here to prevent gas leaks.
- Match Part Number: Use an exact replacement valve for your furnace model and gas type to avoid hazards.
- Apply Pipe Sealant: Apply gas-rated pipe sealant to the male threads, avoiding the first two threads to prevent blockages.
- Thread New Valve: Thread the new valve, following the gas flow direction arrows.
- Tighten Fittings: Use two pipe wrenches to tighten fittings securely but do not overtighten.
- Reconnect Wiring: Reconnect the wiring according to your photos.
- Confirm Pressure Regulation: Confirm pressure regulation is set to furnace specs (e.g., 3.5″ WC). This is a job for a pro.
Post-Installation: Testing for Gas Leaks and Proper Function
This final testing step is critical. Do not skip it!
- Turn On Gas Supply: Slowly turn the gas supply on and listen for hissing.
- Apply Soapy Water Solution: Spray all new connections with a soapy water solution.
- Look for Bubbles: Look for bubbles, which indicate a gas leak. If you see bubbles, turn off the gas, tighten the fitting, and retest. If the leak persists, call a professional.
- Restore Furnace Power: With no leaks present, restore power at the breaker.
- Test Heating Cycle: Set your thermostat to call for heat.
- Observe Operation: Watch the startup sequence for smooth ignition. Check for a stable, blue flame. A yellow flame indicates a problem requiring professional adjustment. Listen for unusual noises.
- Check Heat Output: Confirm the blower starts and distributes warm air efficiently.
Understanding Costs, Valve Types, and When to Call a Professional
Can a Furnace Gas Valve Be Repaired?
Furnace gas valves are sealed units and cannot be repaired; they must be replaced. Their complex design and safety function make field repairs impossible for several reasons:
- No Serviceable Parts: Internal components are not sold separately for field repairs.
- Safety Risks: Tampering with a sealed valve can cause gas leaks or malfunction.
- Voided Warranty: Attempting repairs can void certifications and warranties.
Replacement is the only safe and standard solution for a faulty gas valve.
Different Types of Furnace Gas Valves
Gas valves differ in how they regulate gas flow, which affects system efficiency and comfort.
| Type of Gas Valve | Function | Efficiency & Comfort | Typical Application |
|---|---|---|---|
| Single-Stage | Simple on/off operation; delivers 100% gas flow when activated. | Less efficient; provides consistent, full heat. | Older, less efficient furnaces. |
| Two-Stage | Offers two levels of gas flow (e.g., 60% and 100%). | More efficient; longer, gentler heating cycles; better comfort. | Mid-efficiency furnaces. |
| Modulating | Continuously adjusts gas flow (e.g., 40% to 100%) for precise heating. | Most efficient; maintains very consistent temperatures; highest comfort. | High-efficiency, variable-speed furnaces. |
Valves also work with different ignition systems:
- Standing Pilot: An older system with a continuous pilot light.
- Intermittent Pilot: A more efficient system where the pilot only lights when heat is called for.
- Electronic Ignition (HSI/DSI): Modern systems that use a hot surface ignitor or spark to light the gas directly. Common in new, high-efficiency furnaces in Massachusetts.
When to Avoid DIY Furnace Gas Valve Repair and Call a Pro
While basic troubleshooting is helpful, certain situations demand a professional from Accurate Heat to ensure your safety and system longevity:
- Strong Gas Smell: If you smell gas, evacuate immediately and call your gas company and emergency services. Do not try to find the leak.
- Frequent Lockouts/Error Codes: While you can note the code, a professional is needed to diagnose and resolve the underlying fault.
- Code Compliance: Professionals ensure all work meets local building codes, which is crucial for safety and insurance.
- Lack of Proper Tools: Proper diagnosis requires tools like a multimeter and manometer. If you lack them, it’s time to call us.
- Feeling Unsafe: If you feel uncomfortable at any point, stop and call a professional. Your safety is paramount.
For immediate help with any heating emergency in Massachusetts, our Emergency Heating Services are available 24/7.
Typical Cost of Professional Repair or Replacement
The typical cost for professional furnace gas valve repair (replacement) ranges from $300 to $800. This estimate includes:
- Part Cost: Varies by furnace model and type.
- Labor Costs: Typically 2-4 hours for a certified technician.
- Safety Testing: Includes leak testing and operational checks.
- Permit Fees: May be required by local regulations in Massachusetts.
While professional service has an upfront cost, it ensures safety, code compliance, and warranty coverage, preventing more expensive problems later. For all your heating repair needs, you can rely on our Heating Repair Services.
Frequently Asked Questions about Furnace Gas Valves
What is the most common cause of gas valve failure?
The most common causes of gas valve failure include:
- Wear and Tear: Internal components wear out from repeated use over many years.
- Dirt and Debris: Debris from the gas line can clog the valve or prevent it from sealing. Regular cleaning helps.
- Corrosion: Moisture can corrode internal parts, especially in damp locations.
- Electrical Failure: The solenoid coils that open and close the valve can burn out or short circuit.
- Pressure Fluctuations: Large swings in gas pressure can stress and damage the valve.
How long should a furnace gas valve last?
A furnace gas valve typically lasts 10 to 20 years, depending on several factors:
- Usage: More frequent use, especially in cold climates, shortens the valve’s lifespan.
- Maintenance: As detailed in our guide on Heating Maintenance Prevents Costly Repairs, regular professional maintenance extends the valve’s life.
- Quality: Higher-quality valves last longer.
- Environment: High humidity can cause corrosion and shorten the lifespan.
Can a dirty filter cause a gas valve problem?
Indirectly, yes. A dirty filter doesn’t damage the valve directly but can cause issues that mimic a valve problem:
- Restricted Airflow: A clogged filter blocks air from moving over the heat exchanger.
- Overheating: This lack of airflow causes the heat exchanger to overheat.
- Safety Switch Trips: The high-limit switch trips to prevent damage, shutting down the burners and closing the gas valve.
- Short-Cycling: The furnace repeatedly starts and stops, which can be mistaken for a gas valve problem.
- Component Strain: This constant cycling stresses all furnace parts.
In short, a dirty filter can lead to a misdiagnosis of a faulty gas valve. Always check and replace your air filter regularly!
Conclusion: Ensuring a Safe and Warm Home
Understanding furnace gas valve repair is complex and involves significant safety risks. This guide has covered the valve’s role, signs of failure, and diagnostic steps. While diagnostics are empowering, the clear message is that valve replacement is a job for certified professionals. The risks of gas leaks, explosions, and CO exposure are too high for a DIY attempt.
For homeowners throughout Franklin and all of Massachusetts, Accurate Heat is your trusted partner for all HVAC and plumbing needs. With over 30 years of experience, our team of Mitsubishi Electric Elite Diamond Contractors provides expert, honest, and timely solutions for your home comfort. We offer 24/7 emergency service because we understand that heating issues don’t keep business hours.
For peace of mind, guaranteed results, and the unwavering assurance that your home’s heating system is safe and efficient, trust the certified technicians at Accurate Heat. We’re here to ensure your family stays warm and safe, even on the coldest Massachusetts nights. Explore our comprehensive services in The Ultimate Guide to Furnace Services: Installation, Repair, and Maintenance.